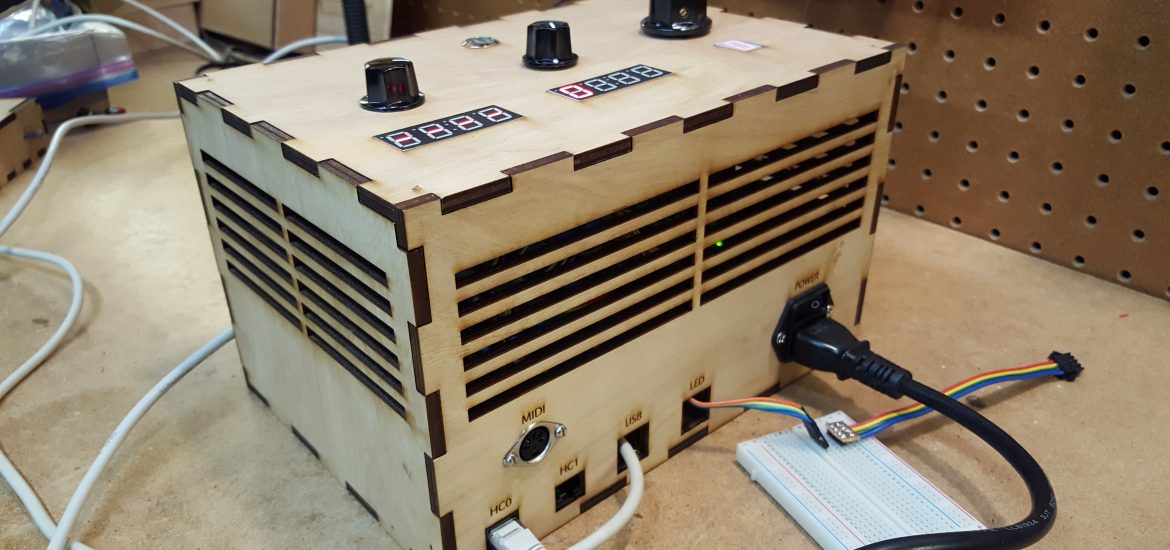
Time to upgrade the control box before Playtest #3. The current box is just a floor and face for the controls. The guts hang out – it’s ugly and probably dangerous.
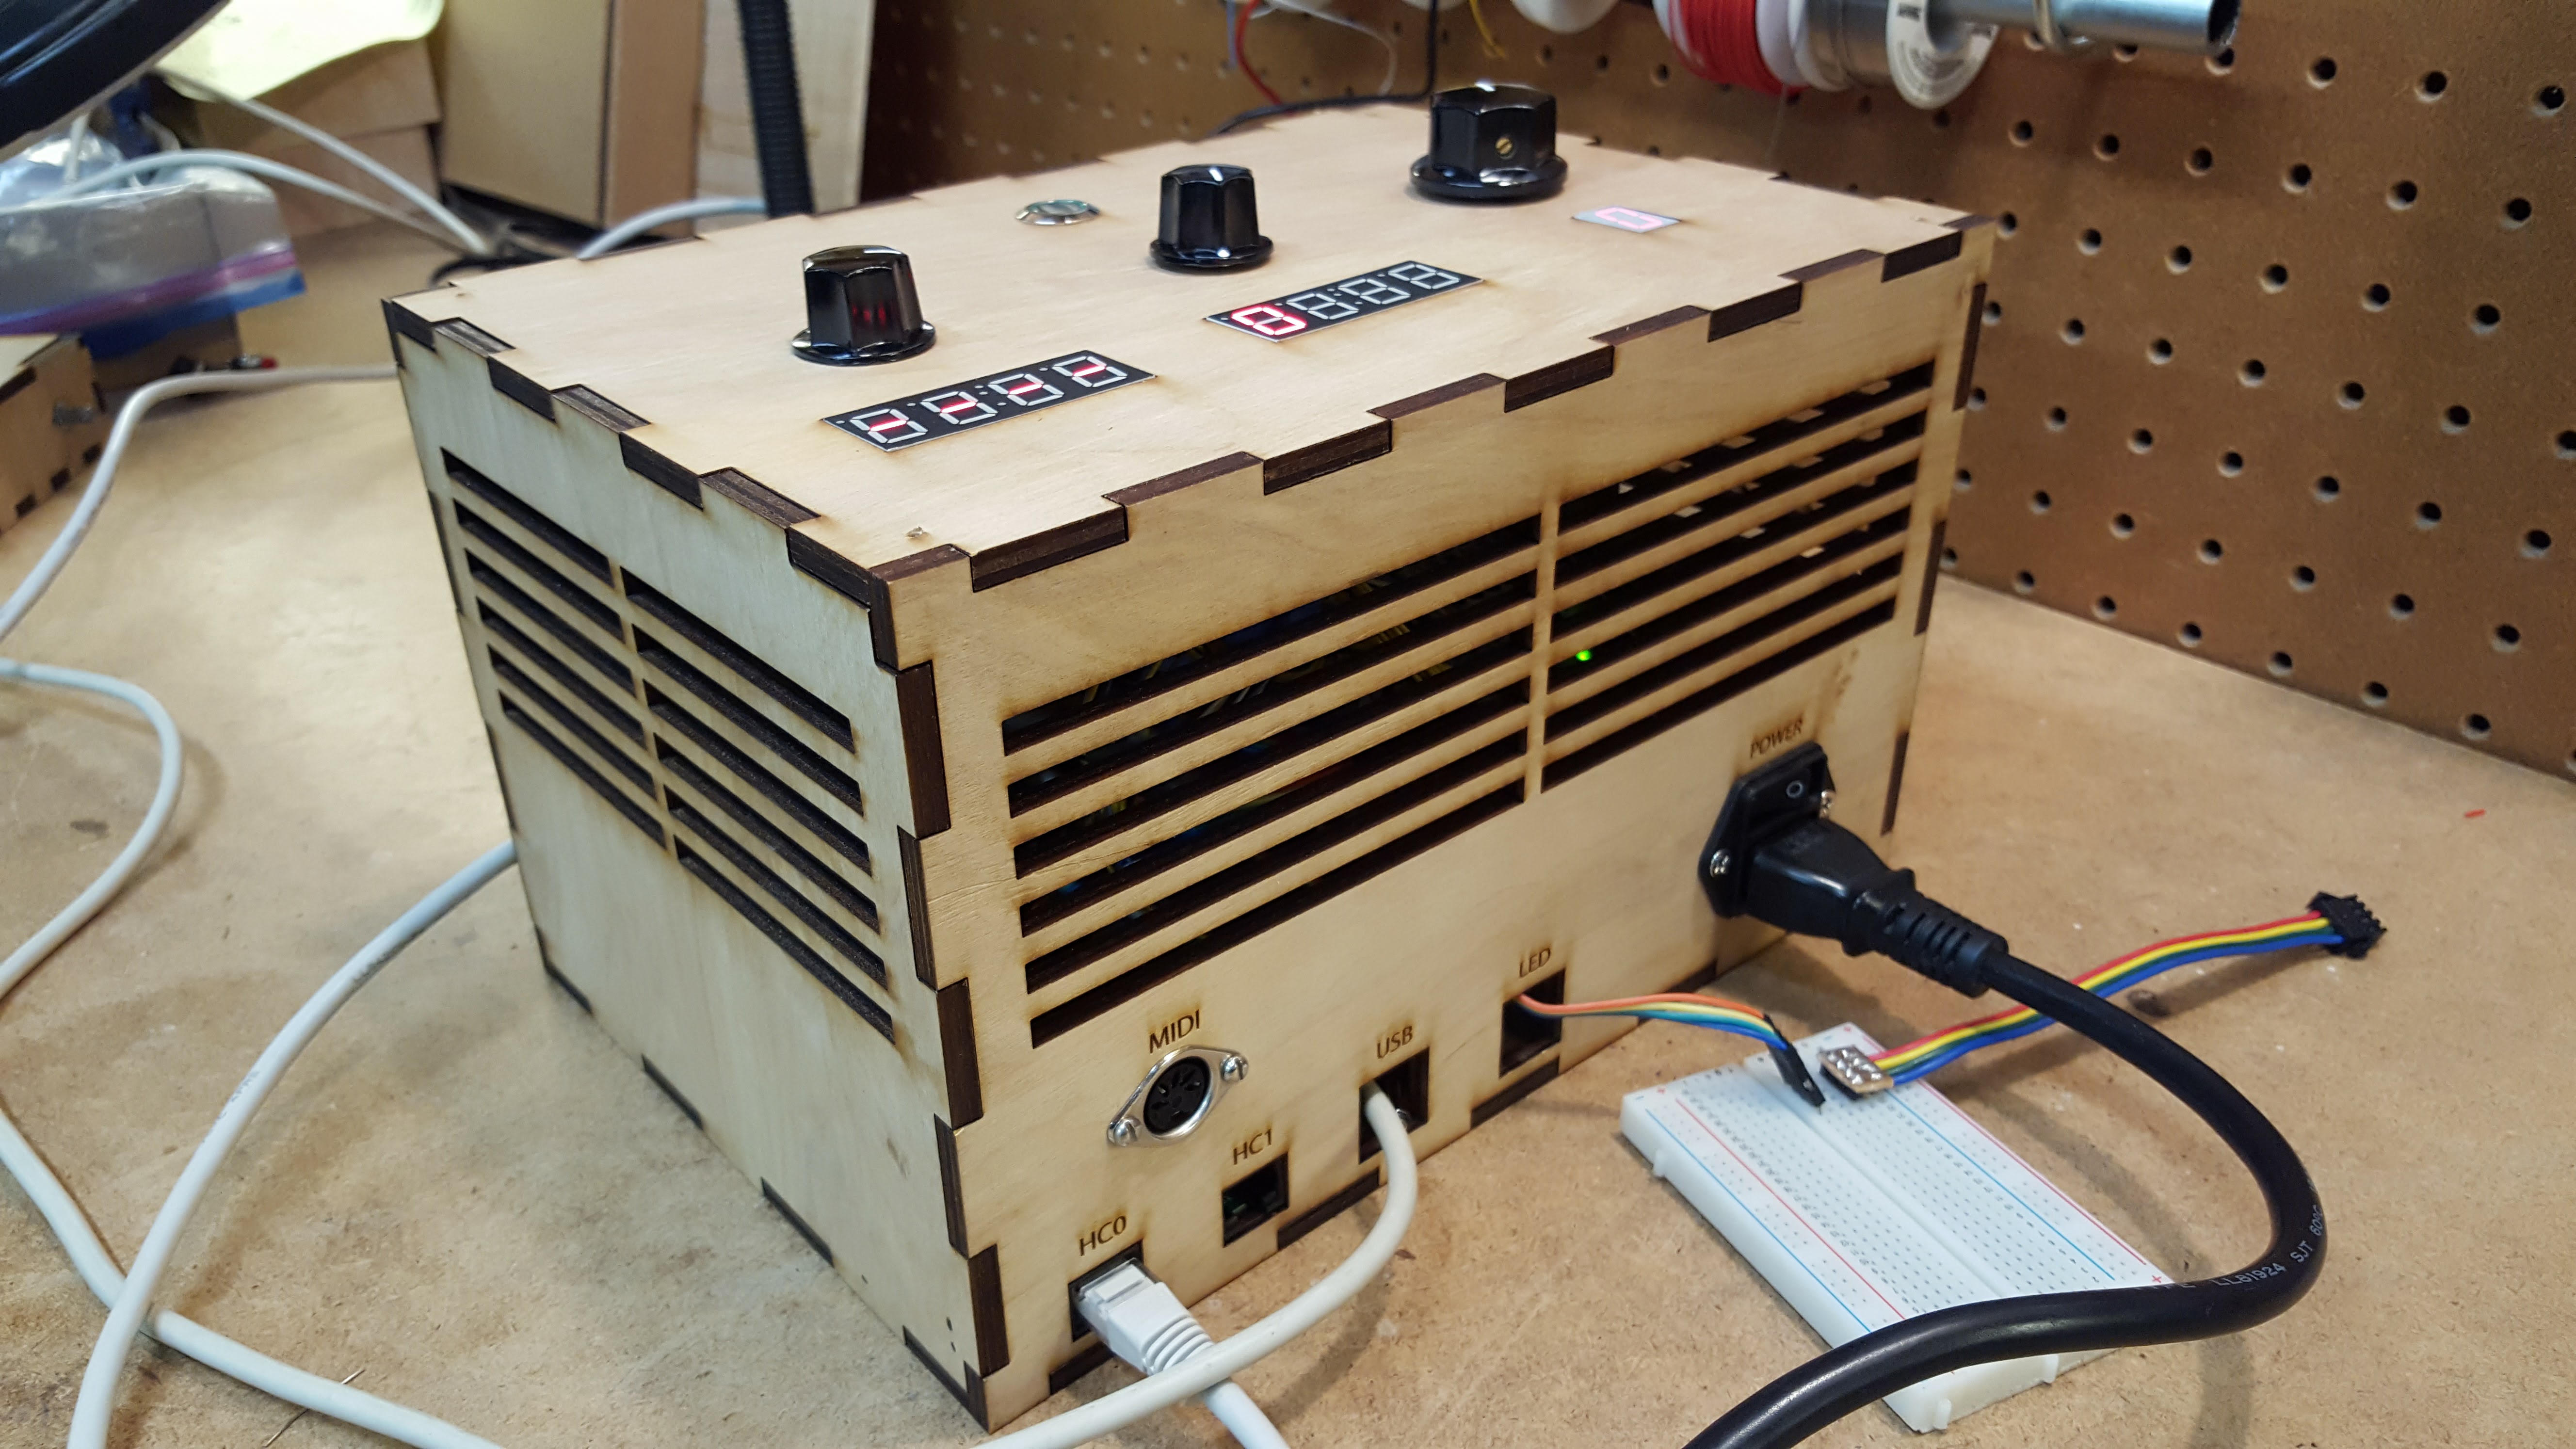
I designed a new box to hold the Arduino Mega, it’s power supply, the control knobs and displays, and jacks for everything external to it.
This is still not a final design – the goal is get something more portable and secure than the current hack. There will be a few more iterations on the design before I settle in on what is needed on the main box.
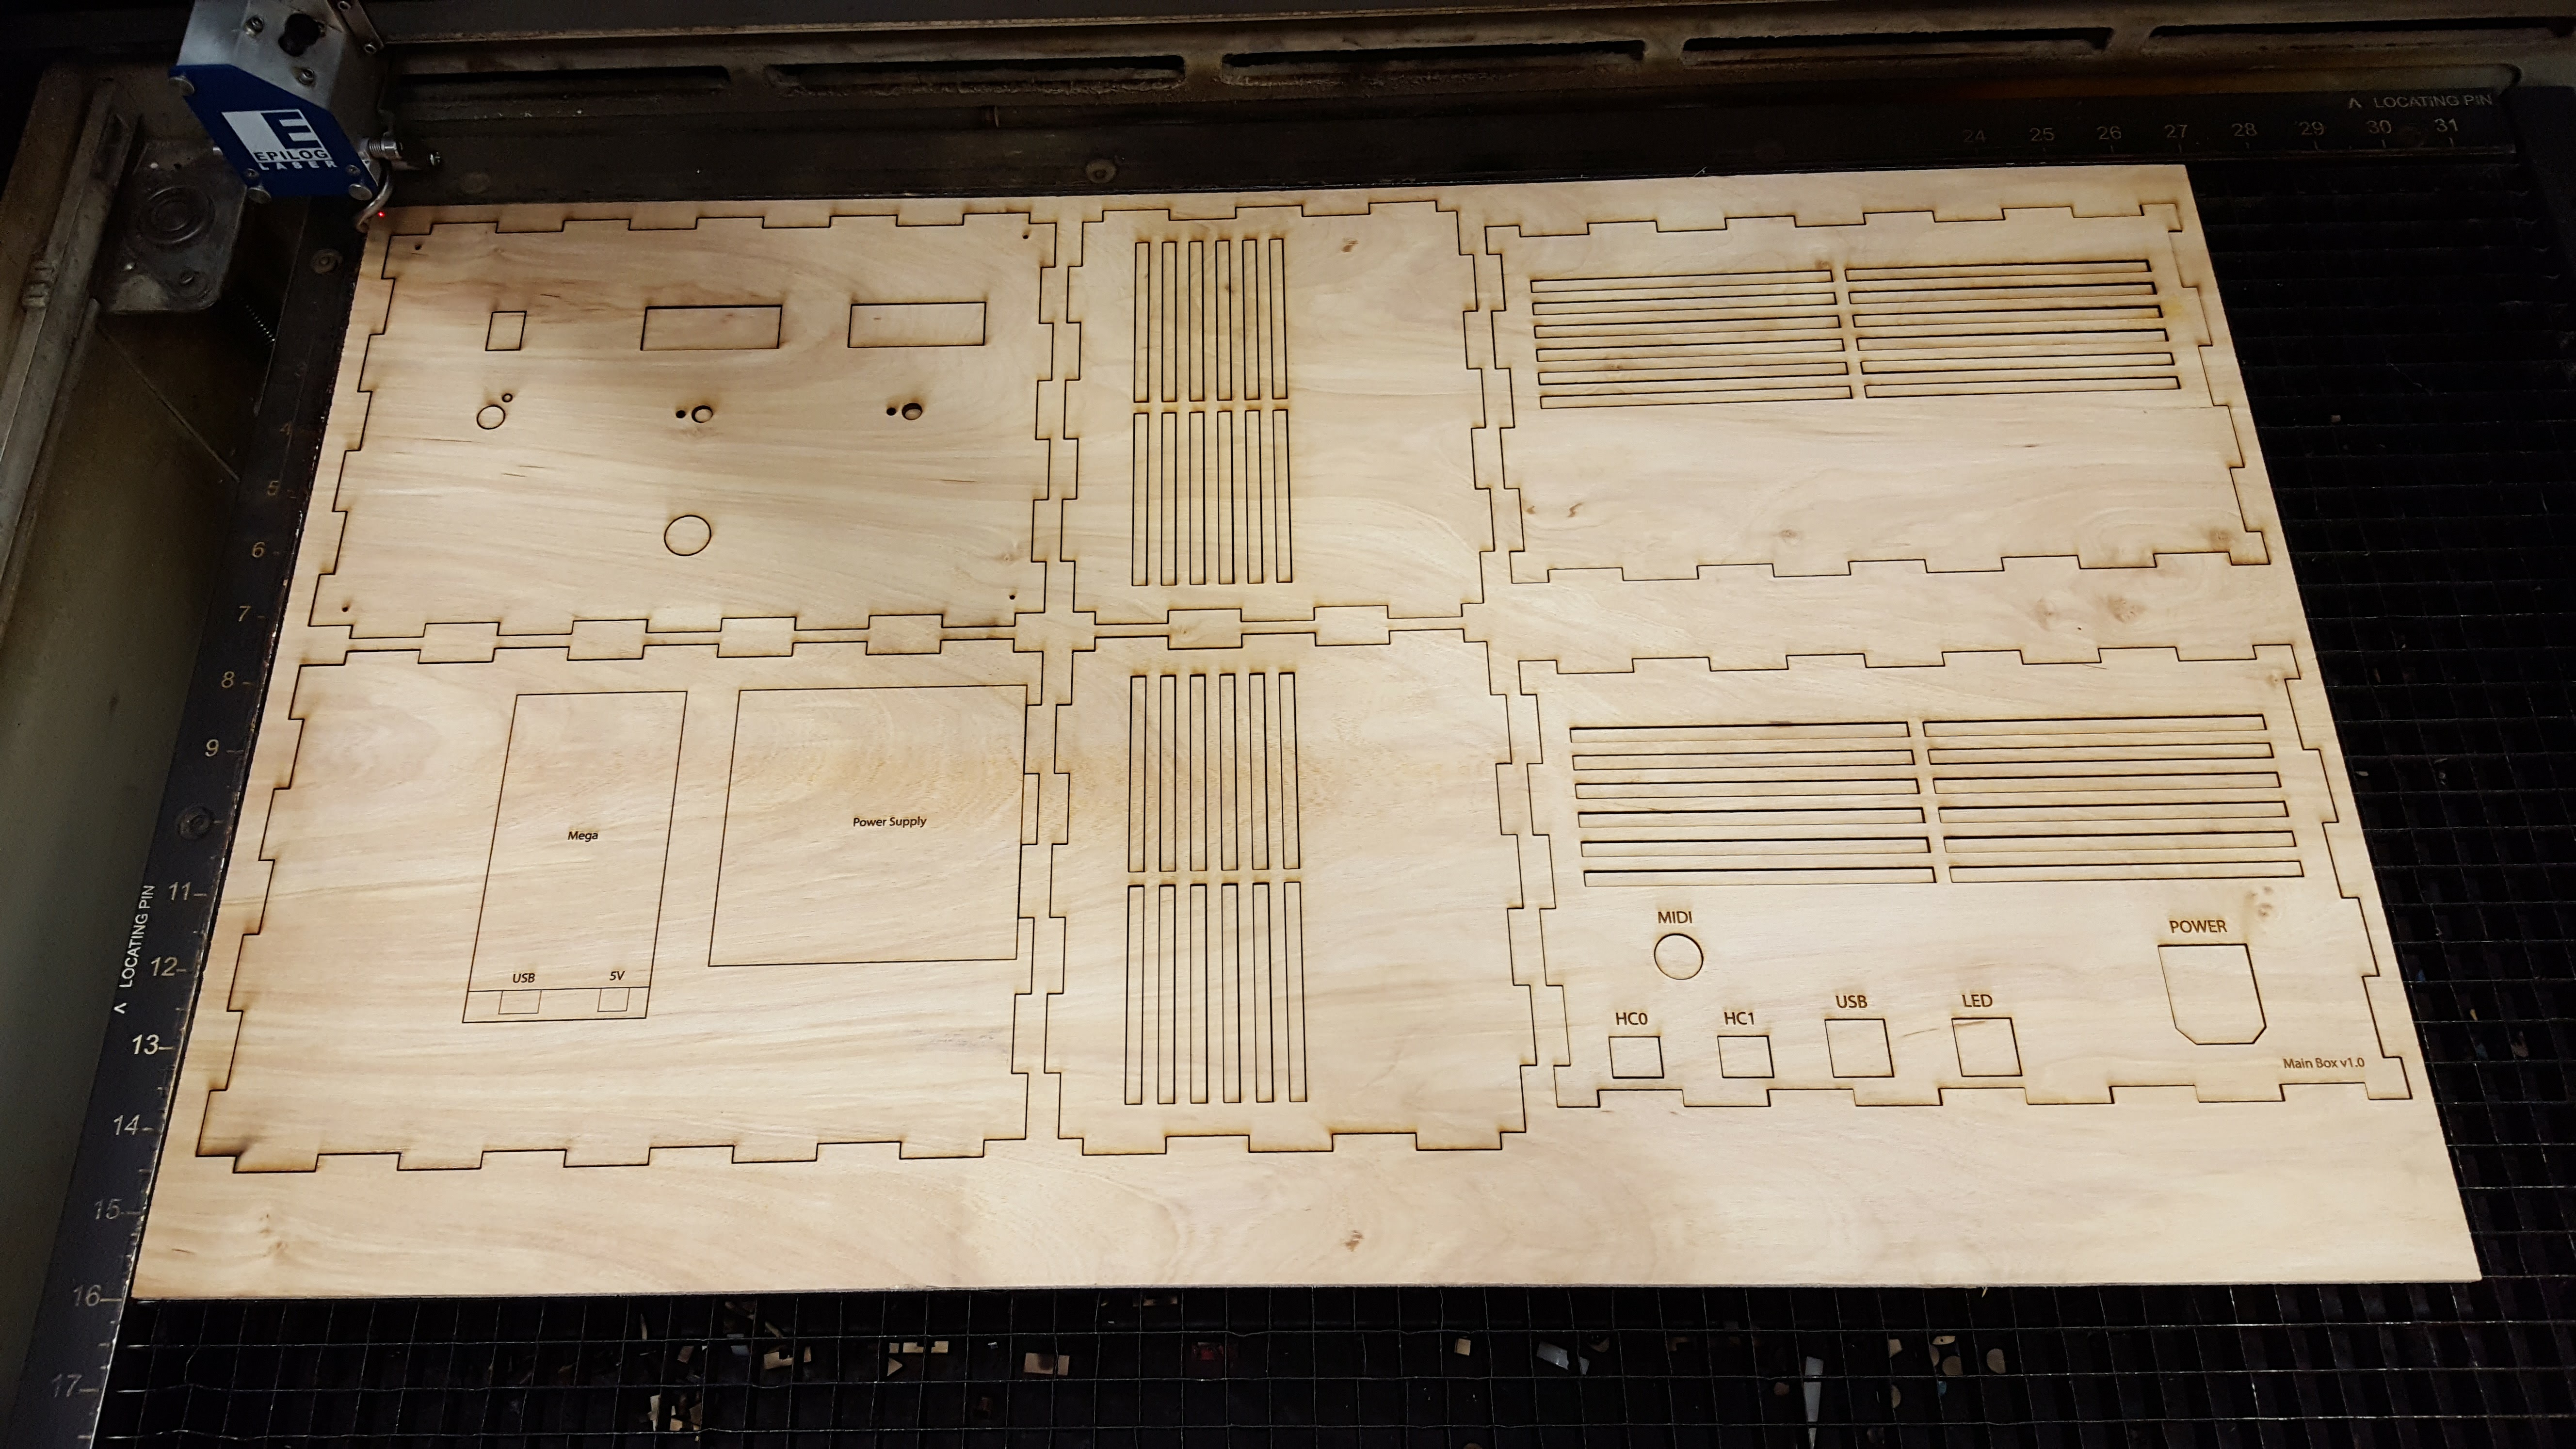
This cut took over 25 minutes to make on the laser cutter at Techshop. Much of that time is my fault for not understanding how to efficiently lay out the raster part of the design. The labels and marking showing where the Mega and power supply go are all raster lines. It took forever to burn the simple single-line squares. I should have done a fast low power laser cut for the thin lines instead.
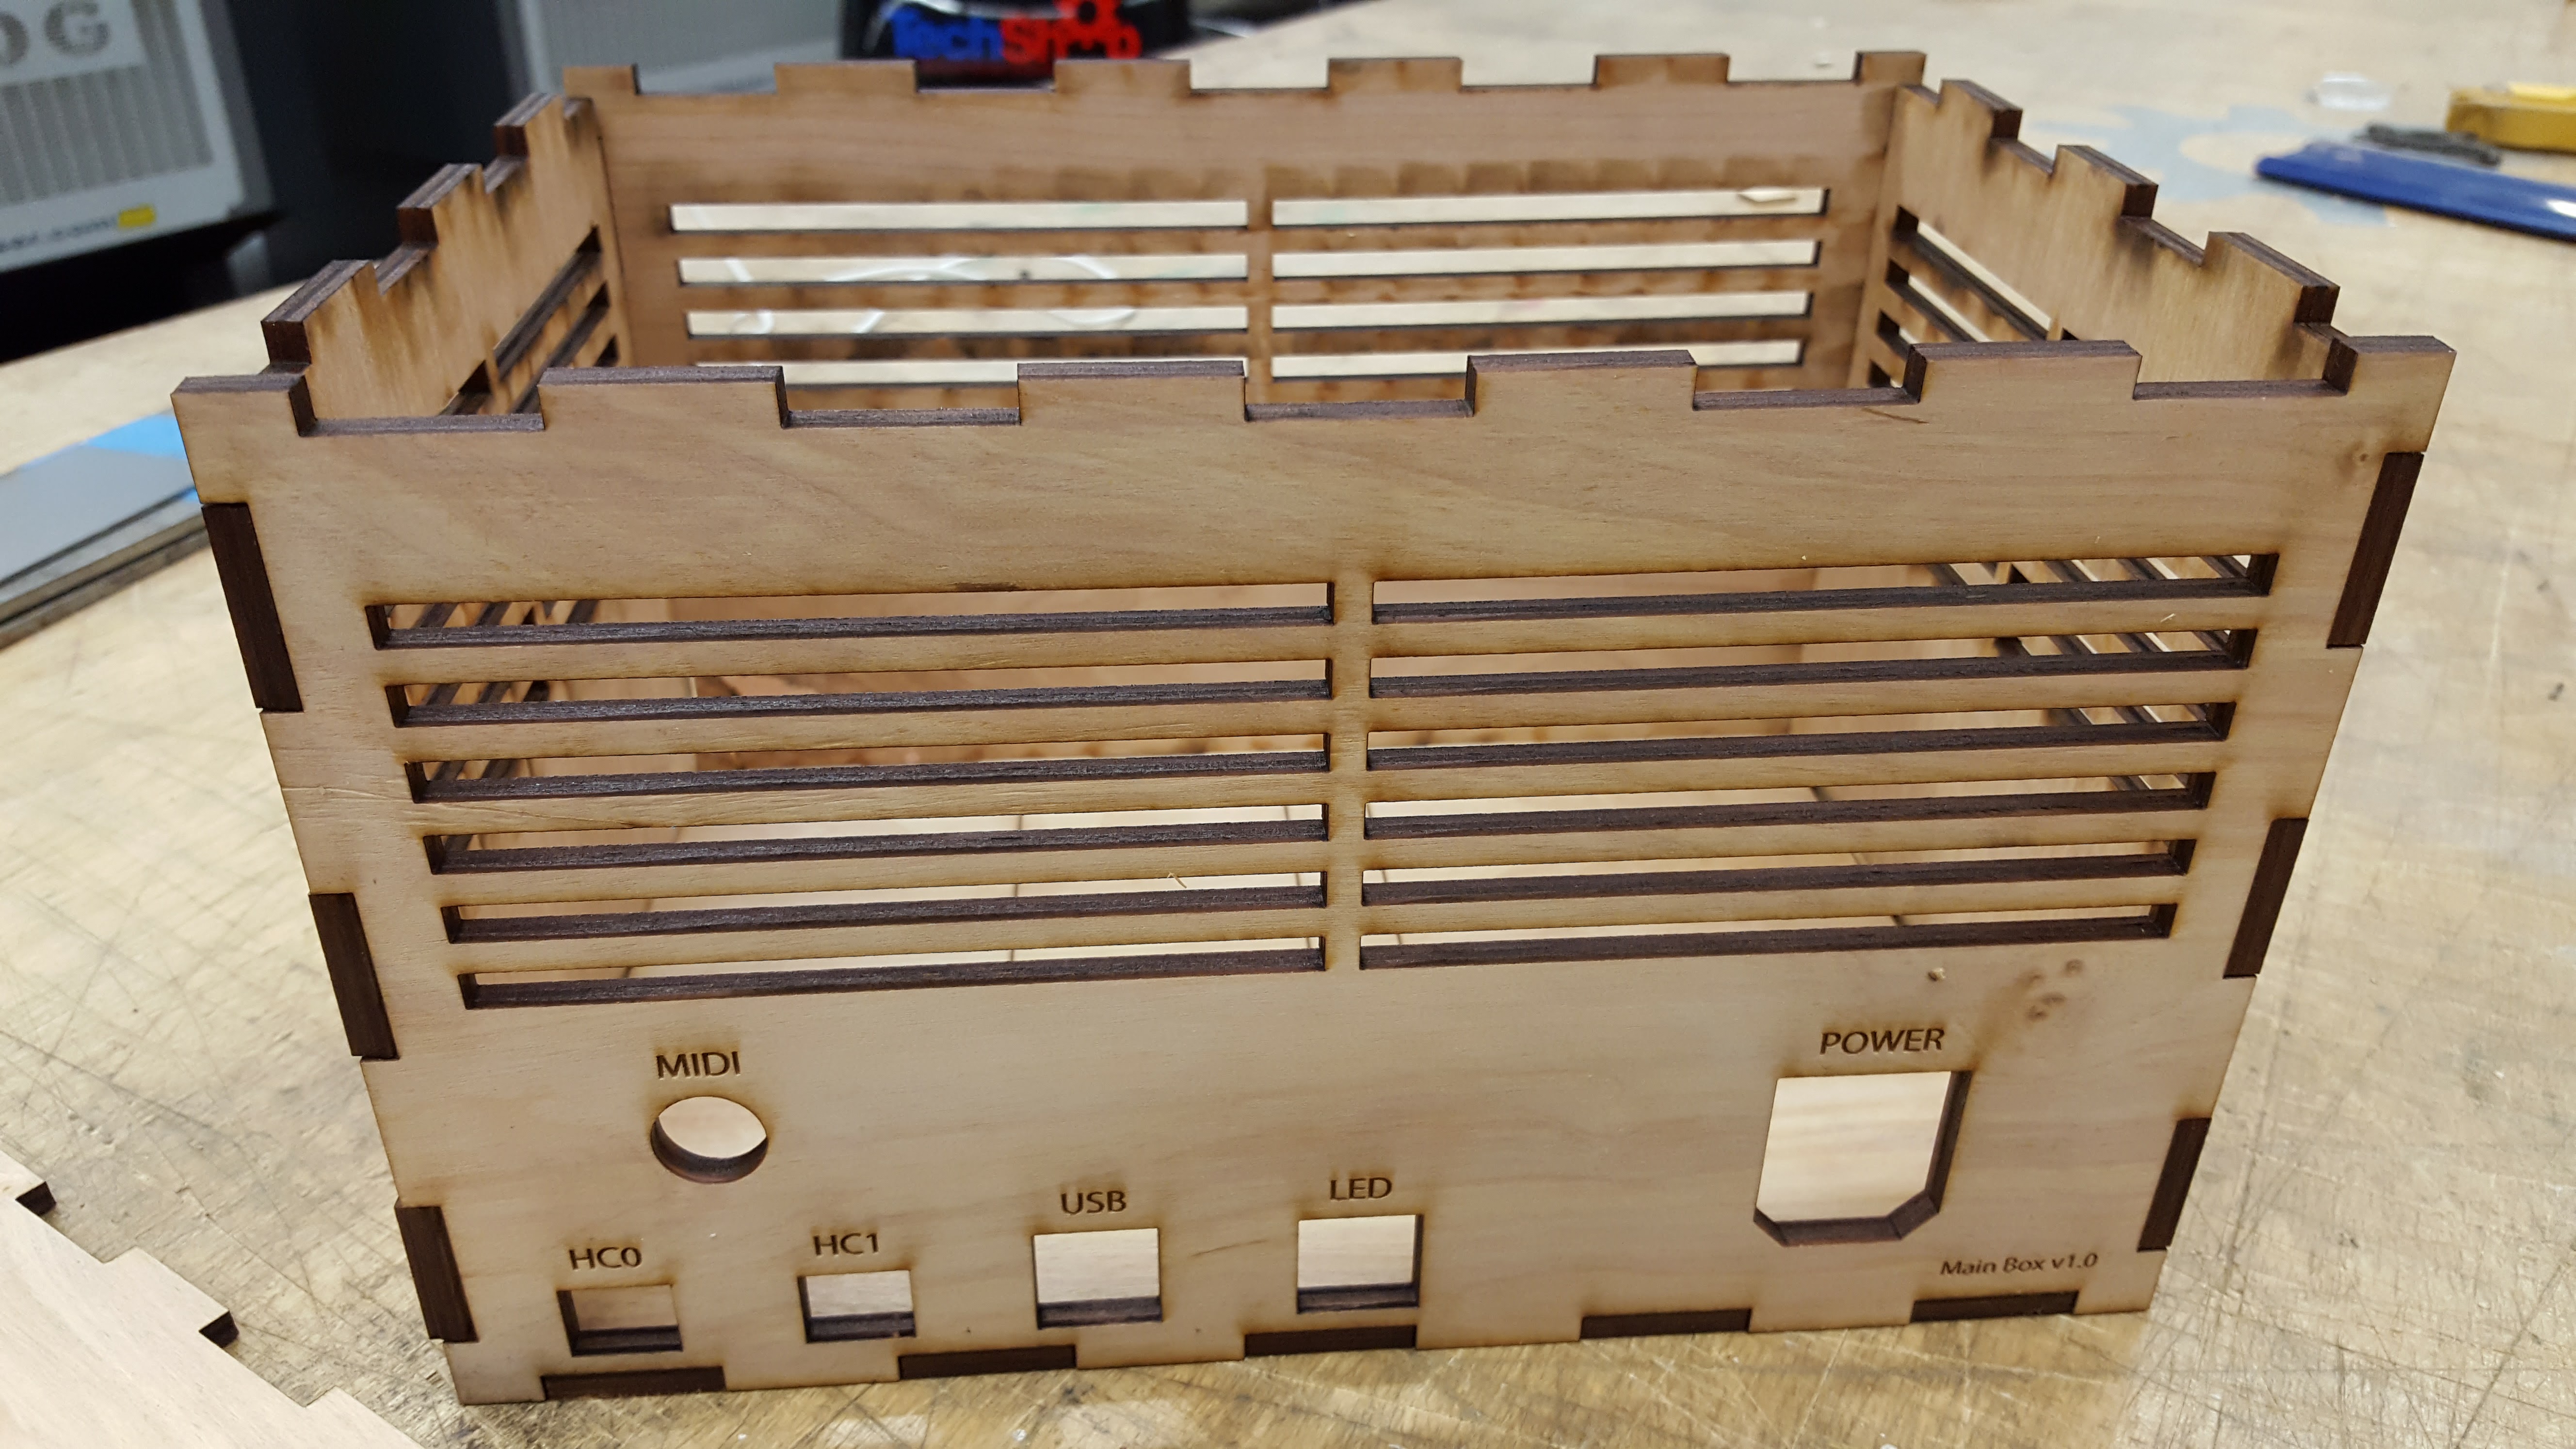
Back home, I assembled and glued the bottom and sides. I learned that I should have used a much thicker piece of wood for the bottom. The Mega, power supply, and some of the jacks are mounted to the bottom. The .2″ wood isn’t enough for a large screw. I glued a piece of 3/4″ plywood for the power supply to screw onto and used small screws filed even shorter for the other pieces.
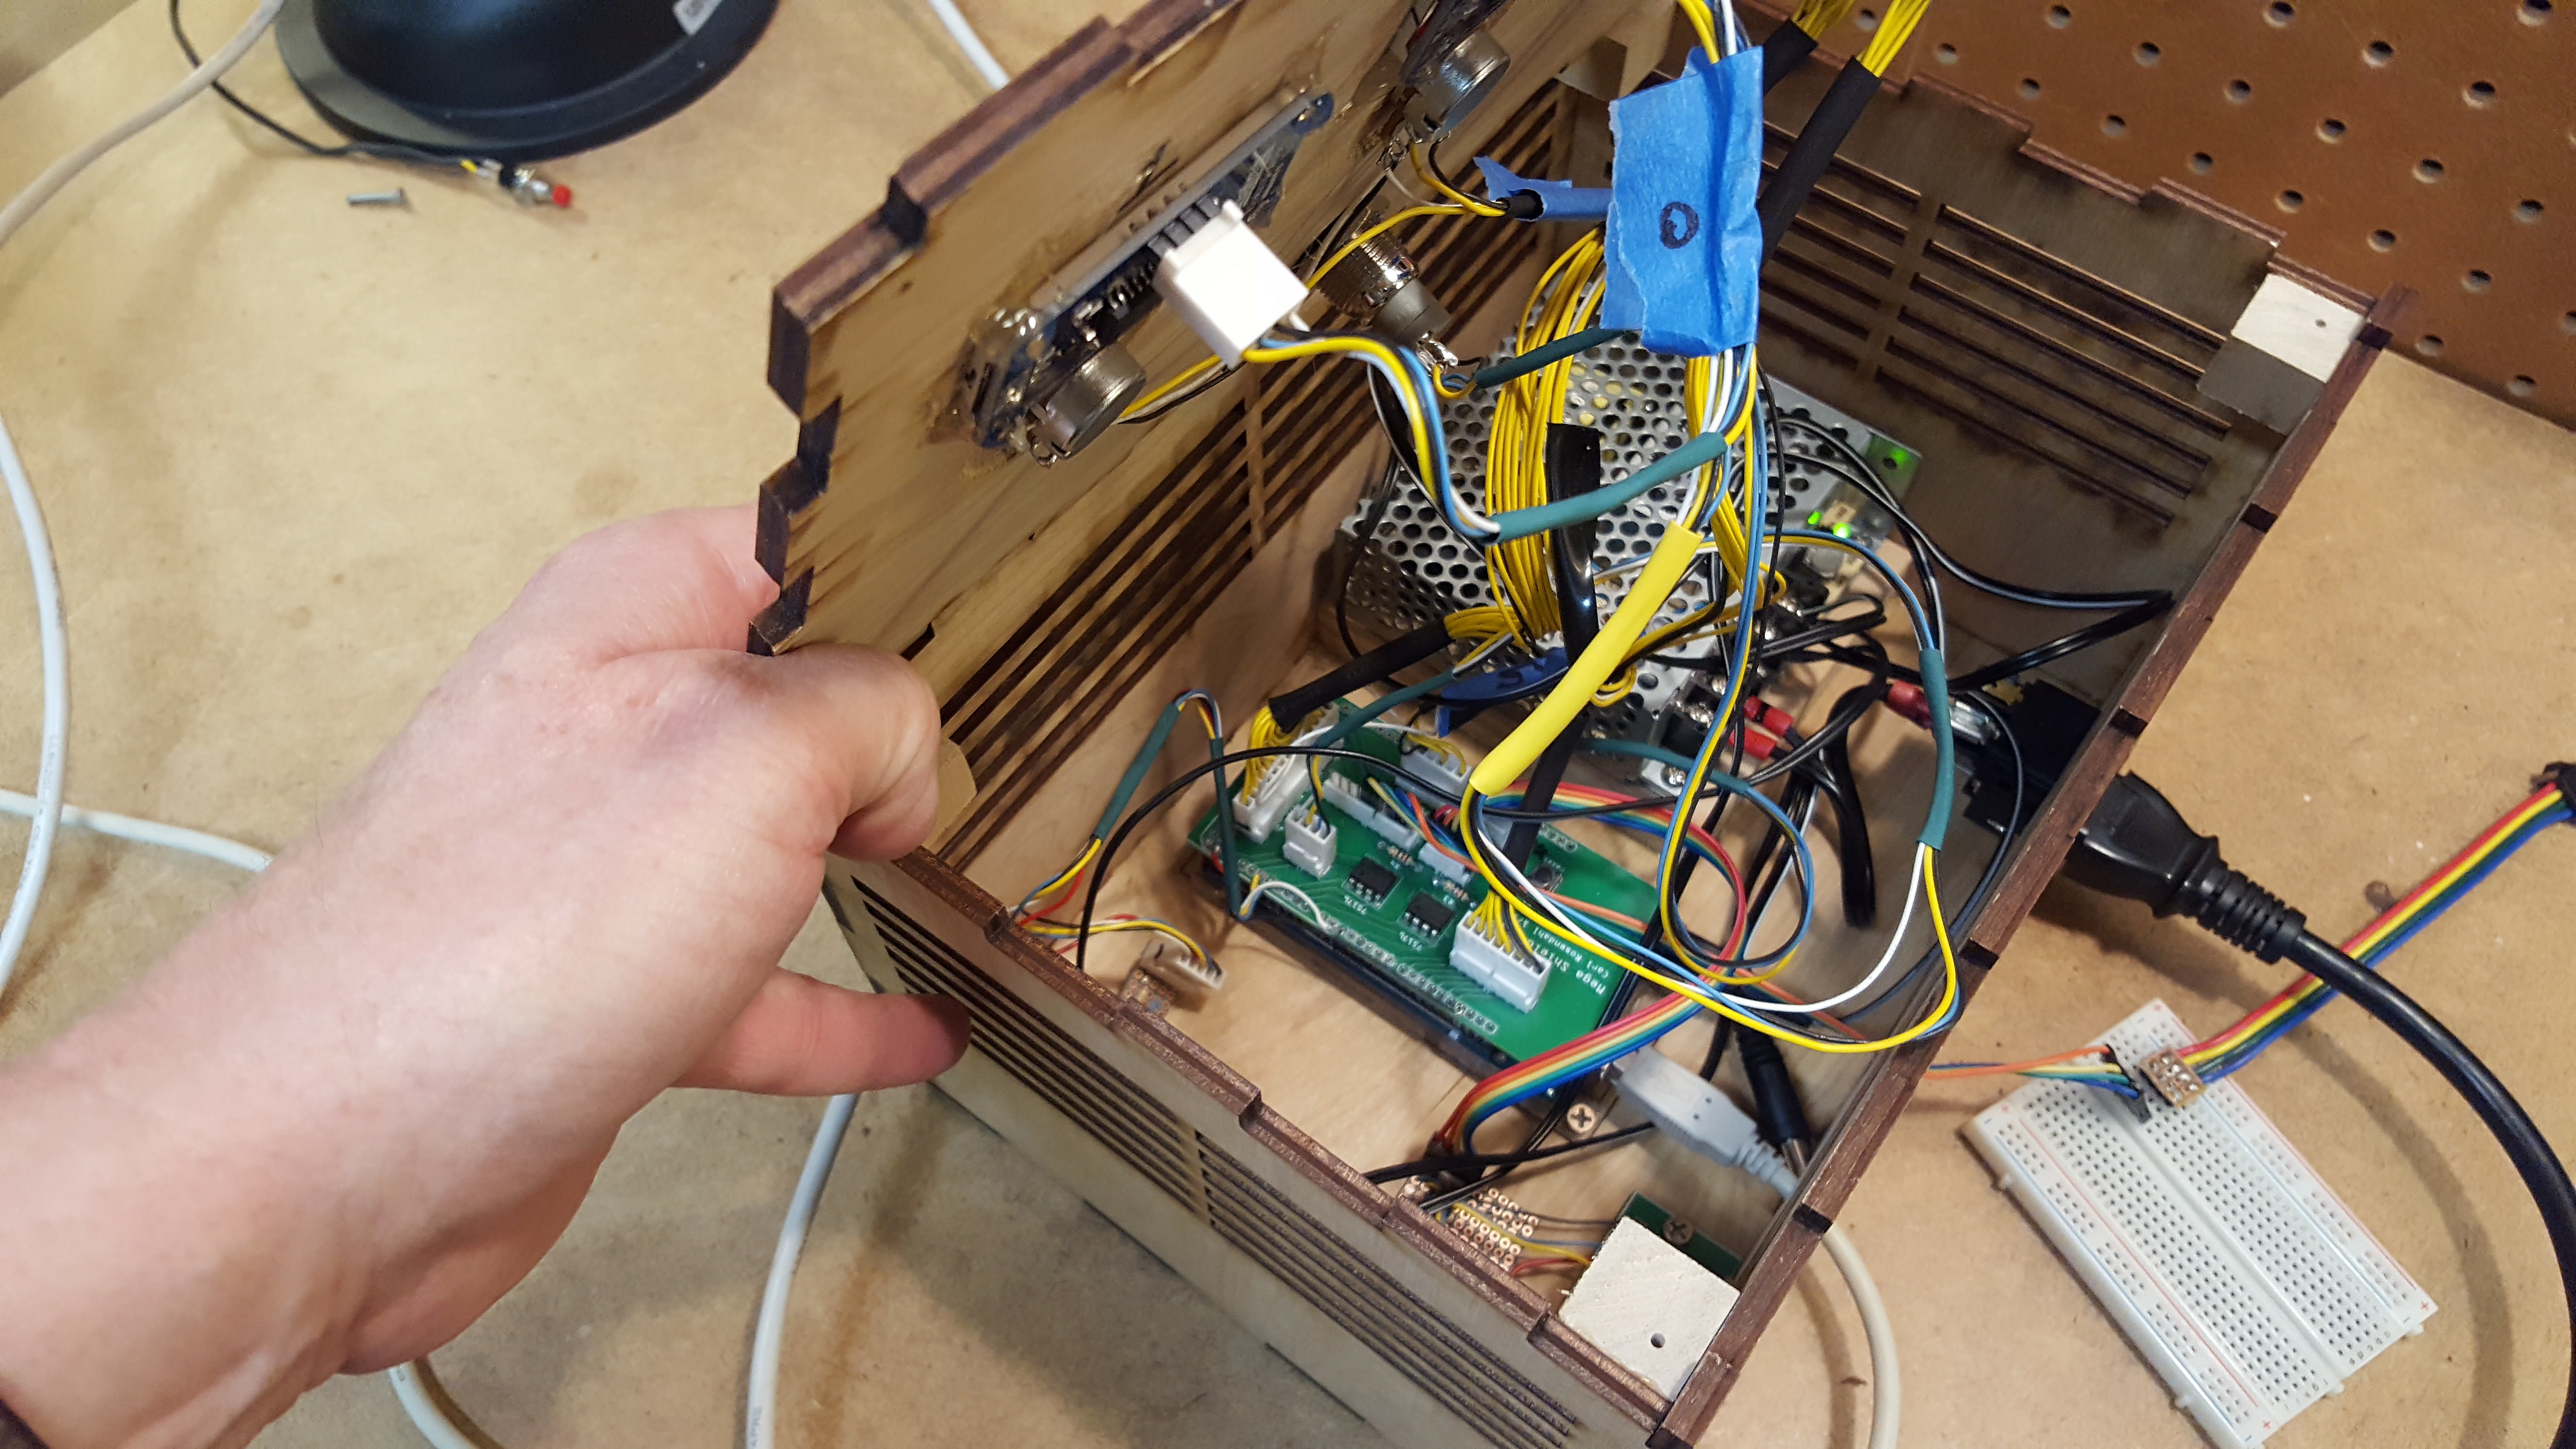
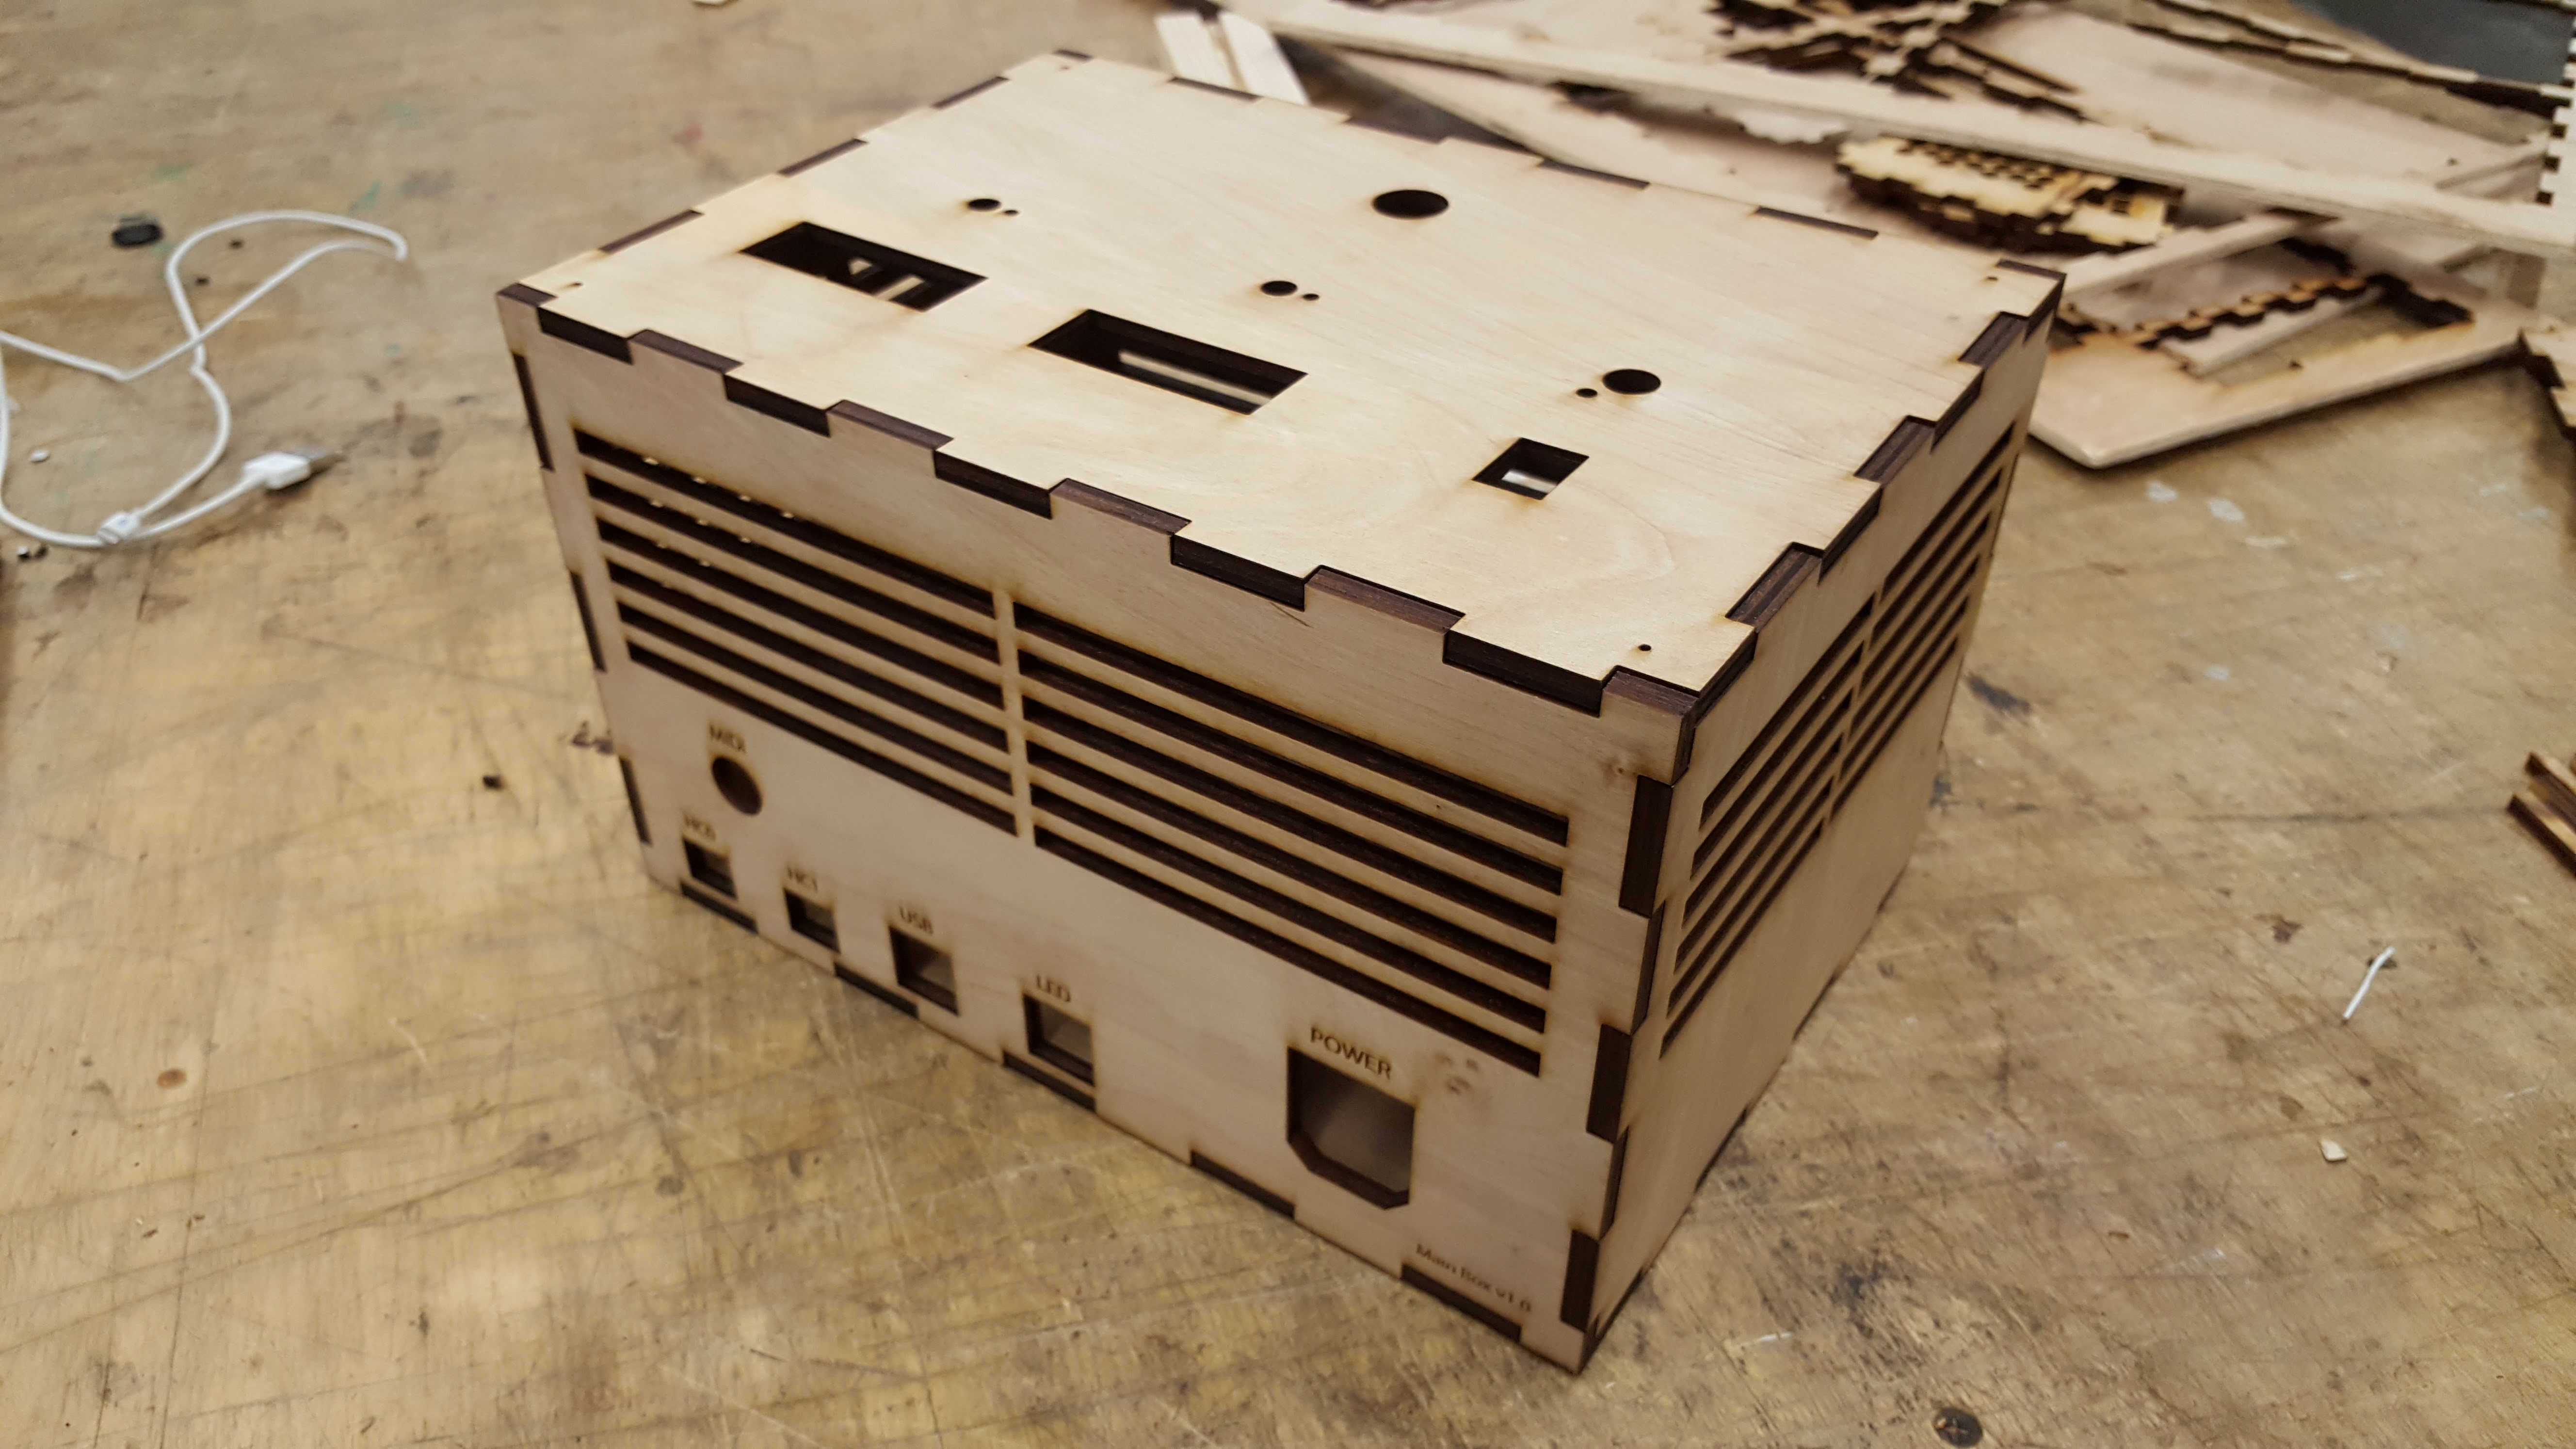
The top isn’t glued on for obvious reasons. There a blocks glued in the corners for the top to screw into, but the fit is snug enough that I haven’t used the screws yet.