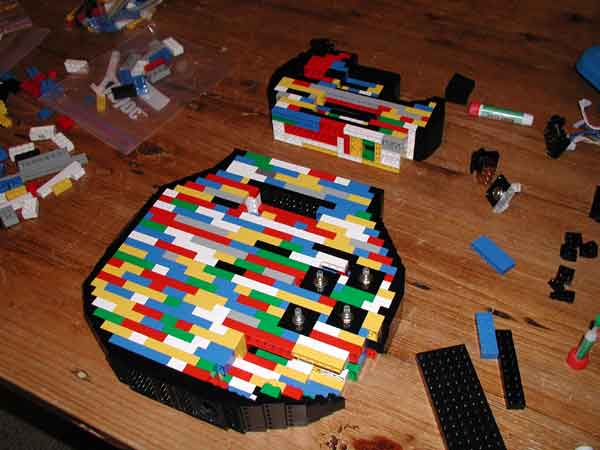
I anticipated that it would take a long time to glue all the body's Lego pieces together, but I didn't anticipate the types of problems I would run into.
When I began the gluing process, the body
was already assembled. The approach I took was to take off the bottom layer,
and then remove the next layer from the old body and glue it onto the prior
layer of the new body. Essentially transferring the body over, layer by layer.

After the first five or six layers I noticed some problems beginning to show up. Since I was transfering and gluing piece by piece, there were small errors that were beginning to accumulate because I wasn't snapping everything in perfectly. Normally when you build with Lego this never shows up because the pieces are able to shift around a bit to correct themselves. However, Krazy Glue locks them into where you snap them the first time, and they can't correct when the next layer goes on. There were a few spots on the sixth layer that I couldn't snap a new piece onto because the pieces below were slowly drifting apart. I actually have to cut off some of the internal pips to get things to come back together.
Because of this I needed to devise a method to guarantee that each layer would be aligned correctly, allowing the next layer to snap into place.

|

|

|
| Use a large flat piece
to act as a form. |
Transfer as many pieces
as possible from the next top layer onto it. |
Apply glue to the
pieces. |

|

|

|
| Snap the glued pieces
onto the bottom section. |
Press down hard! |
Remove the form. |
The other problem I noticed was created by the fact that the glue adds a tiny bit of height to the dimensions of a brick. This is not noticable at all if you are just building up with new single brick layers. Where it became evident is with some of the triple height edge pieces.